
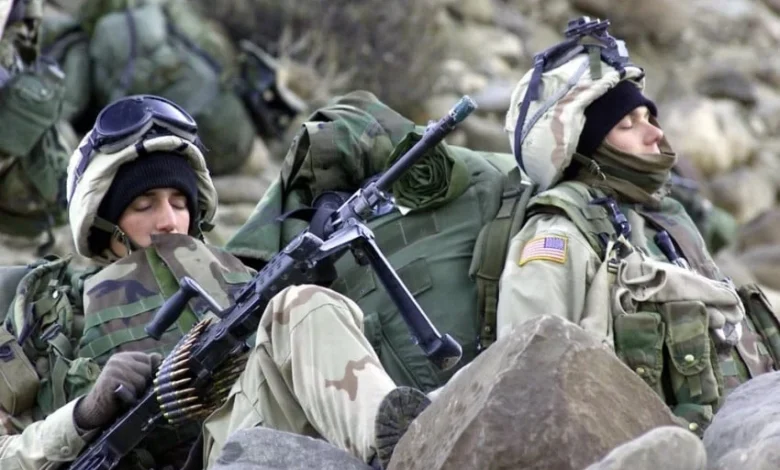
Warfare, often romanticized through narratives of heroic victories and decisive maneuvers, is equally defined by unforeseen challenges and profound setbacks, particularly when elite forces are deployed. History is replete with examples where meticulously planned special operations, despite involving highly trained personnel and advanced technology, have veered into catastrophe, offering invaluable, albeit often painful, lessons in military strategy, intelligence, and execution. These incidents underscore the inherent unpredictability of conflict, demonstrating that even the most formidable global powers are susceptible to operational failures that can have far-reaching implications, challenging perceptions of invincibility and forcing critical re-evaluations of military doctrine and capabilities.
This comprehensive analysis delves into several such pivotal missions, examining their intricate backgrounds, the sequence of events that led to their disastrous outcomes, the crucial data that emerged, and the lasting impacts they had on the involved nations and the broader landscape of modern warfare. From colonial conflicts to contemporary counter-terrorism campaigns, these case studies serve as stark reminders that the pursuit of military objectives, especially those requiring precise and specialized intervention, is fraught with peril and demands an unwavering commitment to meticulous planning, robust intelligence, and adaptive leadership.
The Battle of Isandlwana (1879): Imperial Overconfidence and Zulu Resilience
Background and Objectives
The Battle of Isandlwana, fought on January 22, 1879, stands as one of the most humiliating defeats ever inflicted upon the British Empire by an indigenous force. It occurred during the initial stages of the Anglo-Zulu War, a conflict instigated by British imperial ambitions in Southern Africa. Sir Henry Bartle Frere, the British High Commissioner for Southern Africa,, despite reservations from the British government, had issued an ultimatum to the Zulu King Cetshwayo kaMpande, demanding the disbandment of the Zulu army and acceptance of British suzerainty. When the ultimatum expired, Lord Chelmsford, commander-in-chief of British forces in South Africa, launched an invasion of the independent Zulu Kingdom. The British, confident in their superior weaponry—Martini-Henry rifles, artillery, and disciplined infantry—underestimated the formidable organization, discipline, and sheer numbers of the Zulu impi (regiments), which were primarily armed with spears (assegais) and cowhide shields. The objective was a swift and decisive victory that would dismantle the Zulu military and incorporate their territory into the expanding British colonial sphere.
Chronology of Disaster
Lord Chelmsford’s invasion force, comprising approximately 5,000 British and colonial troops, crossed into Zululand in early January 1879. On January 20, the main column established a camp near the distinctive hill of Isandlwana. Critically, Chelmsford, displaying significant overconfidence and disregard for established military doctrine, failed to order his troops to "laager" (form a defensive circle with wagons) or construct any significant field fortifications, leaving the camp exposed.
On the morning of January 22, Chelmsford divided his forces, taking a significant portion to pursue what he believed to be the main Zulu army, leaving Colonel Henry Pulleine in command of the exposed camp with around 1,300 men, including six companies of the 24th Regiment of Foot. Unbeknownst to the British, a massive Zulu impi, numbering between 20,000 and 24,000 warriors under the command of Ntshingwayo kaMahole Khoza and Mavumengwana kaNdlela Ntuli, had maneuvered undetected and was poised for attack.
Around midday, the Zulu forces launched their renowned "horns of the buffalo" attack formation. The chest (centre) engaged the British front, while the horns (flanks) rapidly enveloped the camp. Initially, British rifle fire, particularly from the Martini-Henry, inflicted heavy casualties on the advancing Zulus. However, critical logistical failures soon emerged: ammunition boxes were screwed shut and difficult to open under pressure, and resupply to the firing line was slow and disorganized. As the Zulu "horns" outflanked the British positions, particularly on the right, gaps began to appear in the thin red line. The Zulus, using their numerical superiority and close-quarters combat skills, overwhelmed isolated British companies. The fighting quickly devolved into a brutal hand-to-hand struggle. Within a few hours, the British camp was overrun.
Supporting Data and Casualties
The casualty figures for Isandlwana were staggering. Of the approximately 1,300 British and colonial troops present at the camp, over 1,300 were killed. This included 858 European soldiers and approximately 471 African colonial troops. Only around 50 Europeans managed to escape the battlefield. Zulu casualties, while significant, were considerably lower in proportion to their numbers, estimated between 1,000 and 2,500 killed and wounded. The battle resulted in the loss of vital equipment, including 1,000 Martini-Henry rifles, 400,000 rounds of ammunition, and two artillery pieces.
Official Responses and Broader Implications
The news of Isandlwana sent shockwaves across the British Empire, prompting public outrage and a parliamentary inquiry. Lord Chelmsford was heavily criticized for his tactical errors, particularly the failure to fortify the camp and splitting his forces. Despite the initial disaster, the British eventually rallied, sending massive reinforcements, and ultimately won the Anglo-Zulu War, decisively defeating the Zulu army at the Battle of Ulundi in July 1879.
However, Isandlwana permanently altered British military thinking. It highlighted the critical importance of reconnaissance, logistics, field fortifications (laagering), and, crucially, never underestimating an adversary, regardless of their technological disparity. The lessons learned influenced future colonial campaigns and contributed to a more cautious approach in tactical planning, emphasizing defensive preparations even when facing seemingly inferior forces. The battle became a lasting symbol of the dangers of imperial hubris and the resilience of a people defending their sovereignty.
Operation Anaconda (2002): Intelligence Gaps and Operational Friction in Afghanistan
Background and Objectives
Operation Anaconda, launched in March 2002 during the early stages of the War in Afghanistan, aimed to destroy a significant concentration of al-Qaeda and Taliban fighters entrenched in the Shah-i-Kot Valley, a mountainous region in eastern Afghanistan. Following the initial overthrow of the Taliban regime in late 2001, coalition forces, primarily American, sought to eliminate remaining pockets of resistance. Intelligence estimates suggested that several hundred enemy fighters, possibly between 150 and 200, were holed up in the valley. The operation’s planners, led by Major General Franklin L. Hagenbeck of the U.S. Army, believed that a coordinated assault involving overwhelming American firepower and Afghan ground forces would quickly dislodge the enemy, who were expected to flee or surrender. The primary objective was to "kill or capture" the remaining senior al-Qaeda leadership believed to be present.
Chronology of Challenges and Engagements
The operation commenced on March 1, 2002, with a complex plan involving several phases. Coalition forces, including elements of the U.S. 101st Airborne Division, 10th Mountain Division, U.S. Army Special Forces, and allied Afghan forces, aimed to encircle the valley and then conduct an air assault to insert troops into blocking positions, effectively trapping the enemy.
However, almost immediately, the operation encountered severe challenges, primarily stemming from flawed intelligence. Instead of a few hundred disorganized fighters, coalition forces faced a far larger, more determined, and well-prepared enemy force, estimated to be between 800 and 1,000 strong. These fighters had established elaborate defensive positions, including reinforced bunkers, caves, and machine-gun nests strategically placed on high ground overlooking the planned helicopter landing zones (HLZs).
As U.S. Army special operations forces and conventional infantry were inserted by helicopters into the valley and surrounding peaks, they were immediately met with intense and accurate machine-gun, mortar, and rocket-propelled grenade (RPG) fire. Several Chinook helicopters were forced to abort their landings or execute evasive maneuvers under heavy attack.
One of the most intense engagements occurred on Takur Ghar mountain, where a reconnaissance team from the U.S. Navy SEALs (Mako 30) attempted to establish an observation post. Their helicopter, a Chinook code-named Razor 03, came under heavy fire and was forced to make a hard landing. During the subsequent firefight and rescue attempts over the next 17 hours, known as "Roberts Ridge" (after Navy SEAL Petty Officer First Class Neil C. Roberts, who fell from Razor 03 during the initial landing), seven U.S. servicemen were killed, and many more were wounded. This intense engagement highlighted the ferocity of the enemy resistance and the severe limitations of pre-mission intelligence.
Throughout the operation, coalition forces struggled with coordination issues between conventional and special operations units, as well as between air and ground assets. Close air support was critical but sometimes delayed, and the rugged terrain made communication and maneuver extremely difficult. The fight for control of the valley became a brutal, protracted engagement, characterized by intense direct fire and sustained air assaults.
Supporting Data and Casualties
Operation Anaconda involved approximately 1,700 U.S. and allied ground troops, supported by Afghan forces, against an estimated 800-1,000 entrenched al-Qaeda and Taliban fighters. The operation resulted in 8 U.S. fatalities (all on Takur Ghar) and around 70 wounded. Three Afghan soldiers were also killed. Enemy casualties were estimated to be between 100 and 1,000, though precise figures are difficult to ascertain due to the nature of the fighting and the mountainous terrain. The intense air campaign involved numerous sorties, dropping hundreds of precision-guided munitions and conventional bombs.
Official Responses and Broader Implications
Operation Anaconda, while eventually declared a tactical success in that the enemy force was largely dispersed, was widely criticized for its initial intelligence failures, coordination issues, and the underestimation of the enemy. Post-action reviews highlighted significant shortcomings in the intelligence preparation of the battlefield, particularly the reliance on outdated information and an over-optimistic assessment of enemy capabilities and intentions.
The operation provided critical lessons for future counter-insurgency and counter-terrorism operations in Afghanistan and beyond. It underscored the necessity of robust, real-time intelligence gathering, improved interoperability between different military branches and allied forces, and the challenges of fighting a determined, adaptable enemy in complex terrain. It also emphasized the need for flexible command and control structures and the inherent risks of air assault operations in contested environments. The bravery and resilience of the coalition forces were commended, but the operational difficulties served as a stark reminder of the complexities of modern warfare and the enduring importance of accurate intelligence.
Operation Eagle Claw (1980): A Multi-Dimensional Failure in Iran
Background and Objectives
Operation Eagle Claw, executed on April 24, 1980, was a highly secretive and ambitious attempt by the United States to rescue 52 American hostages held at the U.S. Embassy in Tehran, Iran. The hostage crisis began on November 4, 1979, when Iranian student militants, supporting the Iranian Revolution, stormed the embassy. The failure of diplomatic efforts and economic sanctions to secure the hostages’ release led President Jimmy Carter to authorize a daring military rescue mission. The mission’s objectives were clear: infiltrate Iran, rescue the hostages, and extract them safely without further loss of life.
Chronology of Failure
The plan was extraordinarily complex, involving multiple branches of the U.S. military (Army, Navy, Air Force, Marines) and a series of coordinated movements. Eight RH-53D Sea Stallion helicopters from the Navy, launched from the USS Nimitz in the Arabian Sea, were to fly to a remote desert staging area in Iran called "Desert One." There, they would refuel from C-130 transport aircraft, meet a ground force of Delta Force operators flown in by other C-130s, and then proceed to a second staging area closer to Tehran. From there, the Delta Force operators would infiltrate Tehran, assault the embassy, rescue the hostages, and transport them to an airfield where C-130s would be waiting for extraction.
However, the mission began to unravel almost immediately due to a cascade of unforeseen problems and mechanical failures.
- Helicopter Failures: En route to Desert One, two of the eight helicopters experienced mechanical problems in a massive, unpredicted sandstorm (haboob). One helicopter returned to the Nimitz, while another landed in the desert.
- Insufficient Helicopters: The plan required at least six operational helicopters to proceed with the mission. With only six remaining at Desert One, and one of those soon developing hydraulic issues, the threshold for continuing the mission was breached.
- Weather and Visibility: The sandstorm severely degraded visibility and contributed to the mechanical issues and delays, pushing the mission further behind schedule.
- Collision at Desert One: As the mission was being aborted, and forces were preparing to withdraw, a tragic accident occurred. One of the RH-53D helicopters, while repositioning, collided with a C-130 transport aircraft that was refueling it. The collision resulted in a massive fire and explosions.
Supporting Data and Casualties
The catastrophic collision at Desert One killed eight U.S. servicemen: five Air Force crewmen on the C-130 and three Marine helicopter crewmen. Several others were injured. The remaining helicopters and equipment had to be abandoned at Desert One in the hasty withdrawal. No hostages were rescued, and the mission was a complete and utter failure, with no engagement with Iranian forces.
Official Responses and Broader Implications
The failure of Operation Eagle Claw was a profound shock to the United States and a major embarrassment for the Carter administration. President Carter took full responsibility for the debacle. A subsequent official investigation, known as the Holloway Commission report, identified multiple factors contributing to the failure, including:
- Inadequate Inter-service Coordination: The mission involved units from different branches that had not routinely trained together for such complex joint operations.
- Lack of a Joint Special Operations Command: There was no single, unified command structure with authority over all special operations forces, leading to disparate doctrines and equipment.
- Insufficient Realistic Training: The mission’s specific complexities, particularly the long-range helicopter flight in adverse conditions, were not fully replicated in training.
- Overly Complex Plan: The multi-stage, multi-platform nature of the plan left little margin for error.
The lessons learned from Operation Eagle Claw were transformative for the U.S. military. It directly led to the establishment of the U.S. Special Operations Command (USSOCOM) in 1987, a unified command structure designed to improve the planning, training, and execution of special operations across all service branches. It also spurred the creation of the Joint Special Operations Command (JSOC), focusing on counter-terrorism and sensitive special missions. Indirectly, the mission’s failure also contributed to the impetus for the Goldwater-Nichols Act of 1986, which significantly reformed the U.S. military command structure to enhance jointness and interoperability. The mission remains a stark reminder of the challenges inherent in highly complex special operations and the critical importance of unified command and realistic training.
Operation Gothic Serpent (1993): The Battle of Mogadishu and the "Mogadishu Line"
Background and Objectives
Operation Gothic Serpent was a military operation conducted by U.S. special operations forces in Mogadishu, Somalia, from August to October 1993, as part of the broader United Nations Operation in Somalia II (UNOSOM II). Somalia was engulfed in a brutal civil war, leading to widespread famine and humanitarian crisis. The U.S. initially deployed forces for humanitarian aid (Operation Restore Hope), but as warlord Mohamed Farrah Aidid increasingly challenged UNOSOM II, the mission shifted. The primary objective of Operation Gothic Serpent, led by Task Force Ranger (comprising elements of Delta Force, Army Rangers, and 160th Special Operations Aviation Regiment "Night Stalkers"), was to capture Aidid and his key lieutenants to dismantle his militia and restore stability.
Chronology of the Battle of Mogadishu
The operation culminated in the intense "Battle of Mogadishu" on October 3-4, 1993. Task Force Ranger launched a daylight raid to capture two of Aidid’s top lieutenants in the Bakaara Market area of Mogadishu, a densely populated and hostile urban environment.
- Initial Success and Ambush: The raid initially went as planned, with Delta Force operators successfully capturing the targets. However, as the ground convoy prepared to extract, it faced unexpectedly heavy resistance from Aidid’s militia and armed civilians.
- Black Hawk Down: The situation escalated dramatically when two U.S. Army Black Hawk helicopters, Super 61 and Super 64, were shot down by RPGs. The loss of these aircraft trapped soldiers on the ground and initiated a desperate, protracted rescue effort.
- Urban Combat: What was intended to be a 30-minute snatch-and-grab operation turned into an overnight urban firefight. U.S. forces, including Rangers, Delta operators, and later a Quick Reaction Force (QRF) comprising U.S., Pakistani, and Malaysian UNOSOM II troops, were engaged in fierce close-quarters combat against overwhelming numbers of Somali militiamen.
- Rescue Convoy: A desperate relief convoy, assembled from UN forces, eventually reached the trapped U.S. soldiers in the early morning of October 4, battling through the city to extract them. Many U.S. soldiers had to run through the streets ("Mogadishu Mile") under fire to reach the safety of the convoy.
Supporting Data and Casualties
The Battle of Mogadishu resulted in significant casualties for U.S. forces: 18 American soldiers were killed, and 73 were wounded. One additional soldier was killed in a mortar attack two days later. Two Black Hawk helicopters were destroyed, and three others were damaged. Somali casualties were far higher, estimated to be between 1,000 and 3,000 killed and wounded, though precise figures are difficult to confirm. The battle also led to the tragic death of Pakistani Lance Naik Abdul Ghaffar and Malaysian Private Mat Aznan Awang, part of the UN relief convoy.
Official Responses and Broader Implications
The images of dead American soldiers being dragged through the streets of Mogadishu by jubilant crowds sparked public outrage and a profound political backlash in the United States. President Bill Clinton immediately ordered a troop surge to ensure the safe withdrawal of U.S. forces from Somalia, which was completed by March 1994.
The Battle of Mogadishu had a profound and lasting impact on U.S. foreign policy and military intervention. It led to the coining of the term "Mogadishu Line," signifying a reluctance by the U.S. and other Western powers to engage in complex, open-ended nation-building or peacekeeping operations in unstable regions, particularly when facing the risk of significant casualties. The incident prompted a re-evaluation of the rules of engagement, the use of overwhelming force, and the political appetite for intervention in humanitarian crises without clear exit strategies. It underscored the extreme dangers of urban warfare against a determined, decentralized enemy and highlighted the critical importance of robust intelligence, overwhelming combat power, and clear political objectives in such environments. The battle remains a powerful cautionary tale about the unpredictable nature of military interventions and the high costs of underestimating local resistance.
Conclusion: Enduring Lessons in the Crucible of Conflict
The annals of military history are rich with narratives of daring special operations, yet the tales of missions gone awry offer equally, if not more, potent lessons. From the ill-fated British campaign at Isandlwana to the intelligence failures of Operation Anaconda, the multi-faceted breakdown of Operation Eagle Claw, and the urban quagmire of Operation Gothic Serpent, these events underscore fundamental truths about warfare that transcend technological advancements and geopolitical contexts.
A recurring theme is the critical importance of accurate, timely, and comprehensive intelligence. Underestimating an adversary, misjudging their capabilities, or failing to grasp the complexity of the operational environment has consistently proven to be a precursor to disaster. Coupled with this is the necessity of meticulous planning that accounts for contingencies, robust logistical support, and the establishment of clear, unified command structures. The fragmented command and control that plagued Operation Eagle Claw, for instance, stands in stark contrast to the integrated approach now championed by U.S. Special Operations Command.
Furthermore, these case studies highlight the unpredictable human element—the resilience of a determined enemy, the courage of soldiers facing overwhelming odds, and the profound psychological and political impacts of battlefield setbacks. They serve as potent reminders that even with superior technology and elite training, no military force is immune to the vagaries of combat. The lessons etched into the collective memory of these operations have profoundly influenced military doctrine, emphasizing adaptability, inter-service cooperation, and a more cautious approach to intervention, particularly in complex, non-linear conflicts. Ultimately, the sacrifices made and the lessons learned from these disastrous special operations continue to shape military strategy, urging a perpetual commitment to humility, foresight, and a profound respect for the inherent unpredictability of the battlefield.